When it comes to stopping electronics from ending up in the landfill, ISP or OEM provided equipment take the cake. The equipment provided is either single-purpose or locked down.
If you’ve already got yourself an aftermarket router to replace the ISP provided Actiontec T3200M, it’d be preferable to use it as an Access Point instead of throwing it in a closet. This requires disabling the router’s DHCP server for proper function.
Table of Contents:
- Disabling DHCP Using The Admin Panel
- How it works
- Drawbacks of this method
- Other Methods I have tried without success
- Special Logins
- Serial Console
- USB Storage
- Flash Chip Extraction
- Command Injection
- Resources
Disabling DHCP Using The Admin Panel
The admin dashboard does allow us to configure the router’s ip address, the dhcp start and end addresses but the option to disable it has been hidden in frontend and isn’t allowed regardless.
It is possible to override the code using browser developer tools in order to bypass the user_id check but this method seems to be patched. See below for the Telus forum discussion.
However, we can completely get around this method by forging network requests generated by the frontend, allowing us to skip javascript entirely, sending data straight to the backend and corrupting the dhcp server configuration, which renders it disabled.
There are only two pieces of software needed for this to work:
- curl (available on Windows, Mac and Linux) as a command line program.
- Any browser devtools, I will be using Chrome devtools.
Before starting, I suggest factory resetting the router using the reset button on the back. holding it down for 10 seconds while the router is on should do it.
After the router has been reset, log in using the admin credentials provided on the router box itself. Go into the Advanced Setup and accept the “risks”.
Get into LAN IP Settings and have the Chrome Developer Tools open. Go into the the Network tab in the developer tools. Check Preserve log so that we can capture the http request.
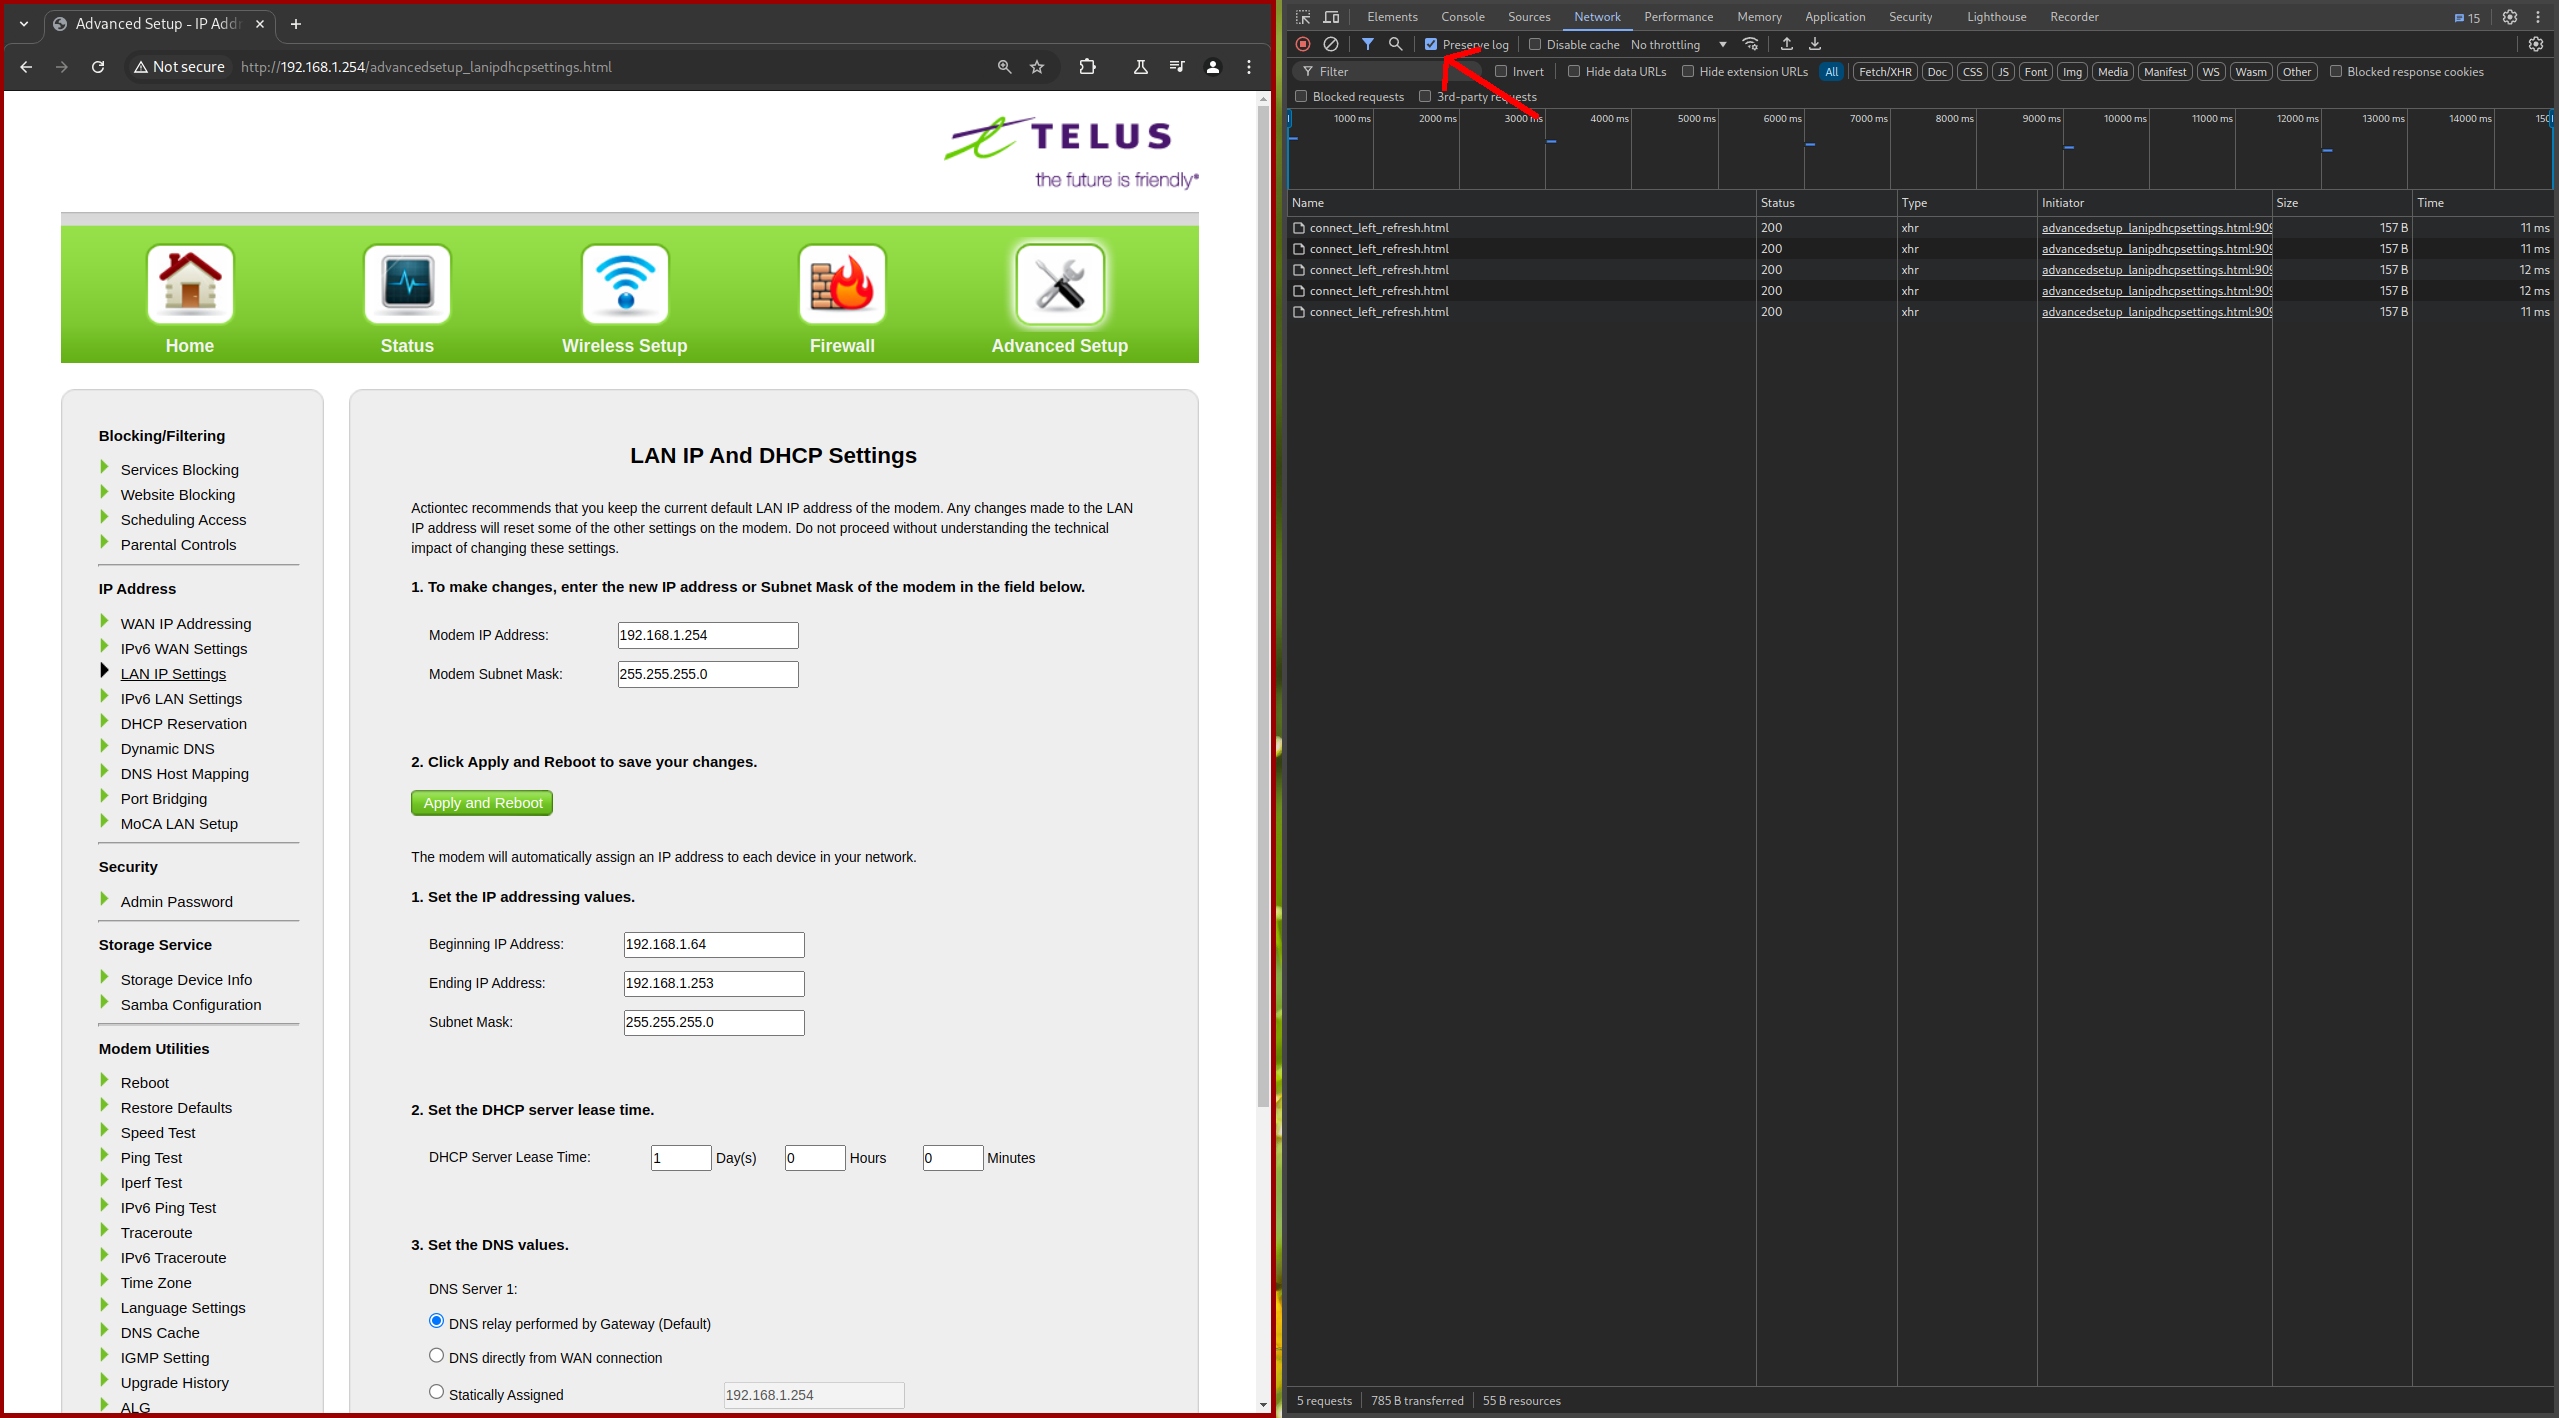
With the developer tools open, press the Apply button at the bottom of the page. We can capture the http request so we can forge it later. The page will redirect you to the LAN IP Settings page again after you’ve pressed apply.
In the network activity, look for the POST request made to advancedsetup_lanipdhcpsettings.cgi . Right click on it and go to Copy -> Copy as cURL.
Paste the command into a terminal, and replace the following in the --data-raw argument:
'enblDhcpSrv=1&dhcpEthStart=192.168.1.64&dhcpEthEnd=192.168.1.63&dhcpSubnetMask=255.255.255.0&dhcpLeasedTime=1440&landnsType1=default&landnsPrimary=192.168.1.254&landnsType2=dynamic&landnsSecondary=0.0.0.0&dnsRefresh=1&sessionKey=YOURSESSIONKEY¬hankyou=0'
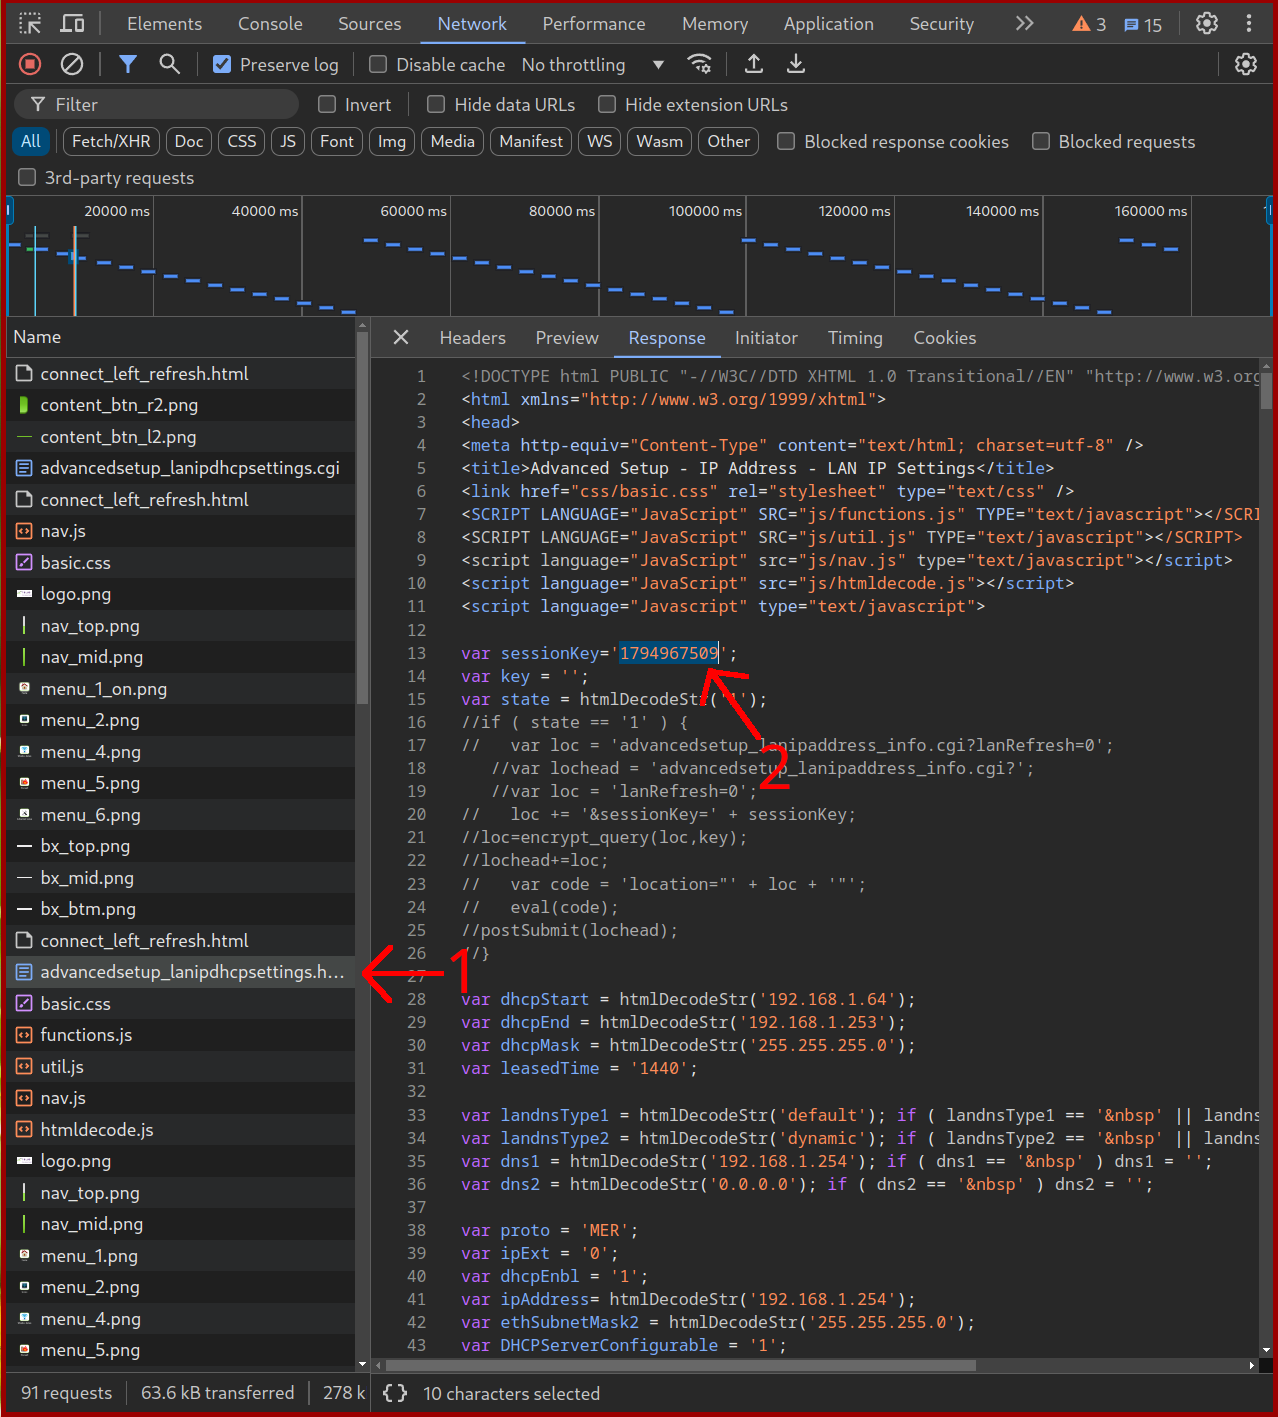
Make sure to replace YOURSESSIONKEY with the session key obtained from the page after you pressed apply. The sessionkey should be in the GET request made after pressing Apply which made it redirect us back to the LAN IP Settings page as can be seen here:
The command executed should look like the following:

And after the command is run, it should print out something along the lines of “Wait for settings to apply” in HTML format:
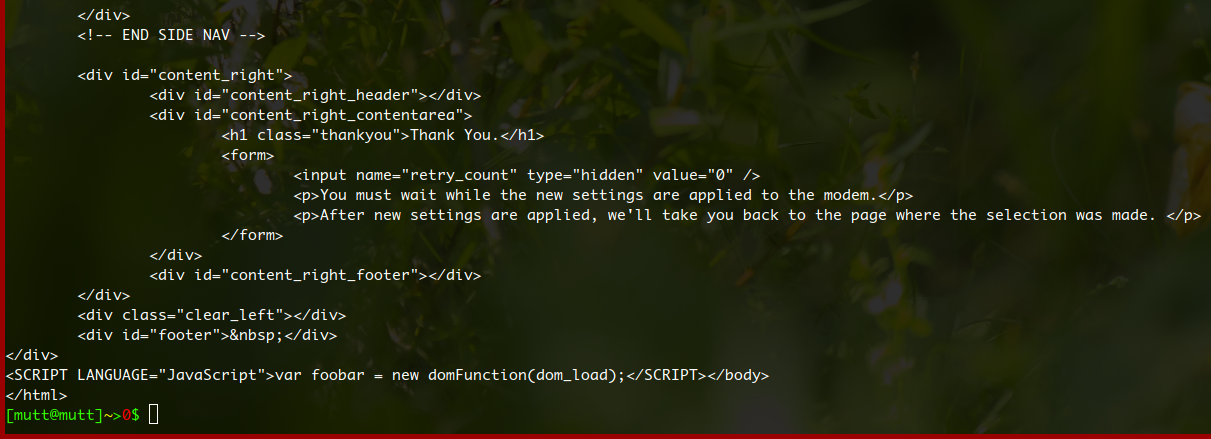
If this result does not come back, something has gone wrong in the process, it can give a sessionkey or sessionid mismatch warning. At that point, logging in again should do the trick. The sessionkey can also be obtained by looking at the page source (Ctrl + U in chrome).
After all of this is done, going back to the settings page, it should look like this:
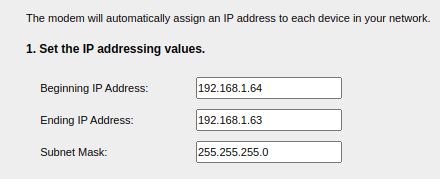
This means our request forgery has worked and has invalidated the router’s DHCP settings, therefore disabling the DHCP server.
Now connecting the main router (with a working DHCP server) to a LAN port will make the t3200m act like an access point and network switch.
How it works
The way this works is very basic, the frontend of the modem has checks for verifying some settings but the backend lacks some checks which we’re abusing here.
Disabling the DHCP server using the interface itself has been hidden and also is not allowed using the admin login, but what we can achieve is corrupt the DHCP server configuration by giving it an invalid start and end range for the IPs it will be handing out, that is,
dhcpEthStart=192.168.1.64&dhcpEthEnd=192.168.1.63
This will completely disable the DHCP server and the main router connected to one of the T3200M LAN ports will be acting as the only available DHCP server and handing out the correct, preferred ip addresses to clients either connected to WIFI or the LAN ports.
Setting enblDhcpSrv=1 to 0 should also be able to disable the DHCP server as discussed here but it has been patched and required special privileges.
Drawbacks of this method
I have tested this method many times and a DHCP server does not seem to be running at all on the T3200M. I have used dhclient to confirm. dhclient -v -r eth0 and then dhclient -v eth0 confirms that there’s only one DHCP server alive and receiving our broadcasts. Wireless works the same but there seem to be some small problems.
The problem is not obvious at all, but after a connection has been established with wifi devices, the connection is stable for a some time but then there are some interruptions and some TCP connections seem to just die.
One possible culprit could be the DHCP server trying to restart because of the invalid configuration which will keep reconfiguring the network interfaces, making interruptions which I’ve witnessed. However, no signs of this can be found in the serial console logs.
I have yet to validate this problem and look for possible fixes but it’s nothing to worry about.
Other Methods I have tried without success
Special Logins
Disabling the DHCP server should not be harder than editing the dnsmasq (probably their dhcp server) config file or disabling the startup service if we get access to a special login or get a shell into the device.
By default, Telus does not allow the regular “admin” user to disable the DHCP server. From what I could gather, there’s a higher privileged user on the router which has permission to disable the DHCP server. I can only assume it’s a login reserved for Telus on-site technicians if they want to do advanced configuration on the router. But the login is not publicly available.
I have tried to guess the technician login from older models but I was unsuccessful. Resorting to using the UART console to get a shell.
Serial Console
Comes the UART console which requires openning the router.
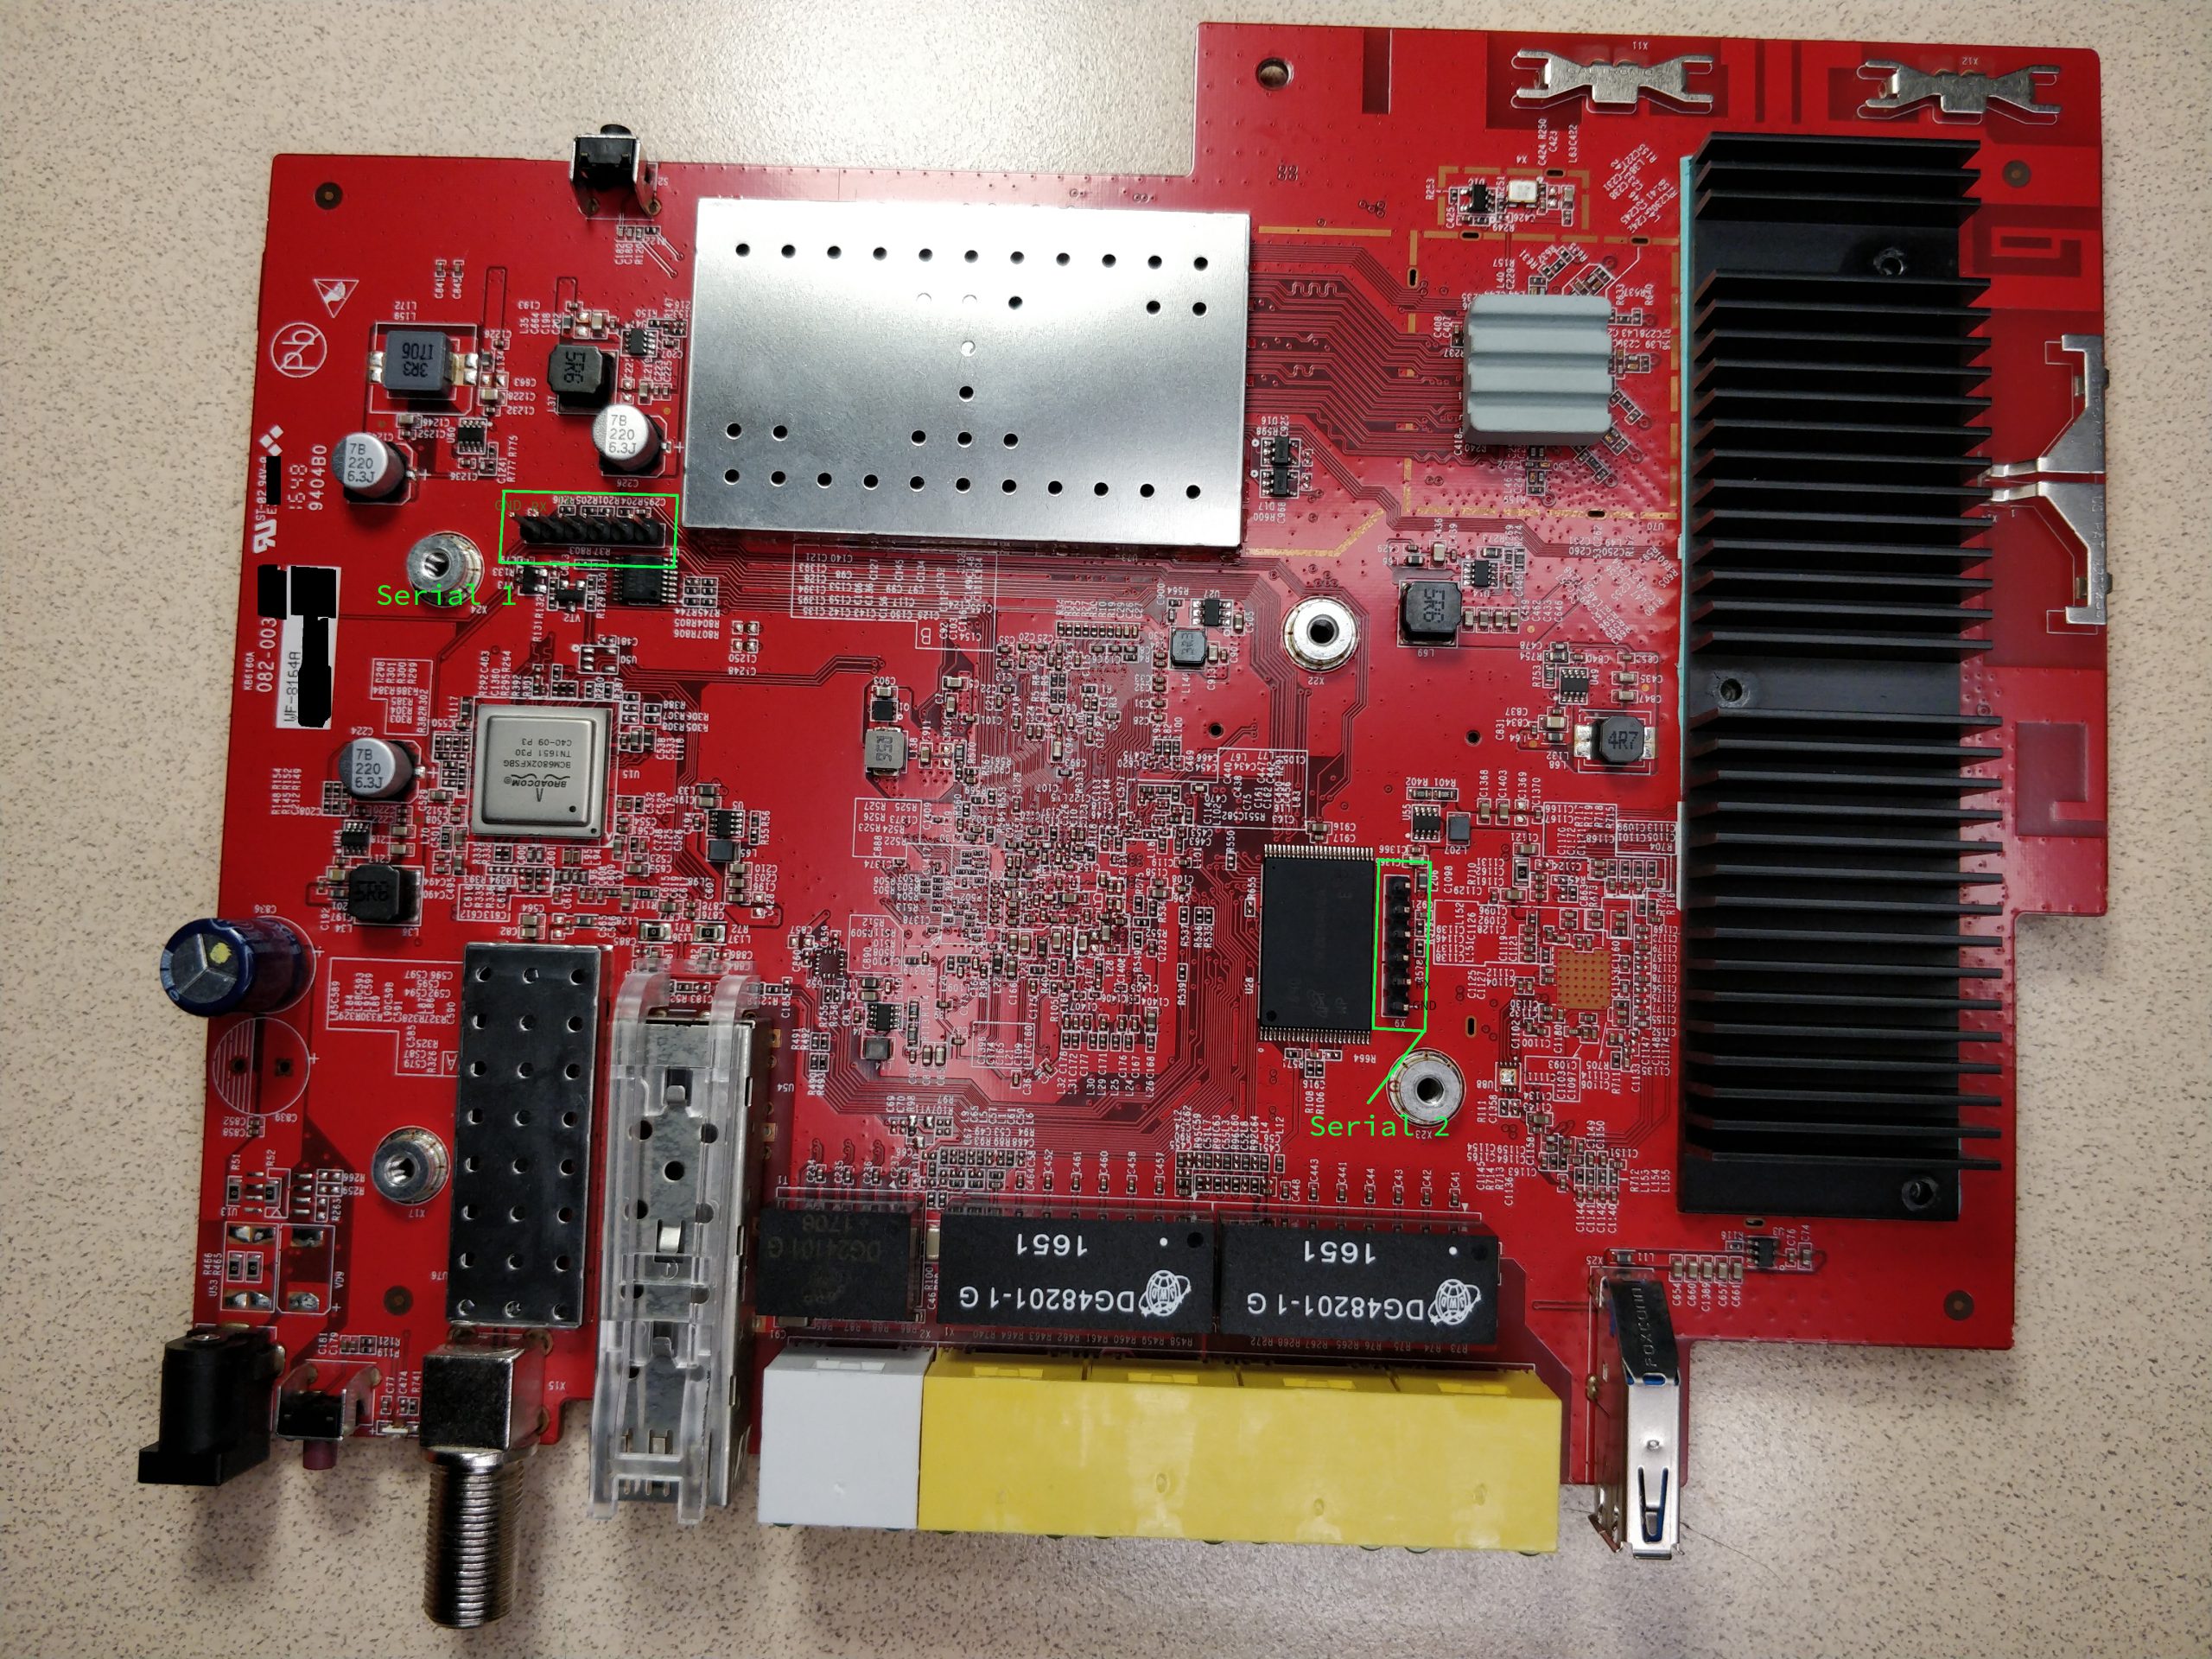
The baudrate of the the serial port is 115200 and the correct connector is the one next to the flash chip which I have named Serial 2.
Interrupting the autoboot by pressing Enter drops us into a uboot login prompt we do not have the username/password to, which is a fail. Going forward with the boot process, we get dropped into another login prompt, only this time, it’s a linux login prompt. Trying many combinations of “admin”, “tech” and “root” and various common passwords gave no results. I’m guessing when it comes to Customer Premises Equipment(CPE), they must have started to lock things down tight.
With the older Telus routers holding down the SIGQUIT key combination which is CTRL + \ allowed us to kill a password prompt and get dropped into a root shell. However this method does not work any longer as it’s been patched.
I have attached the log dumps at the end of this post if anyone’s curious.
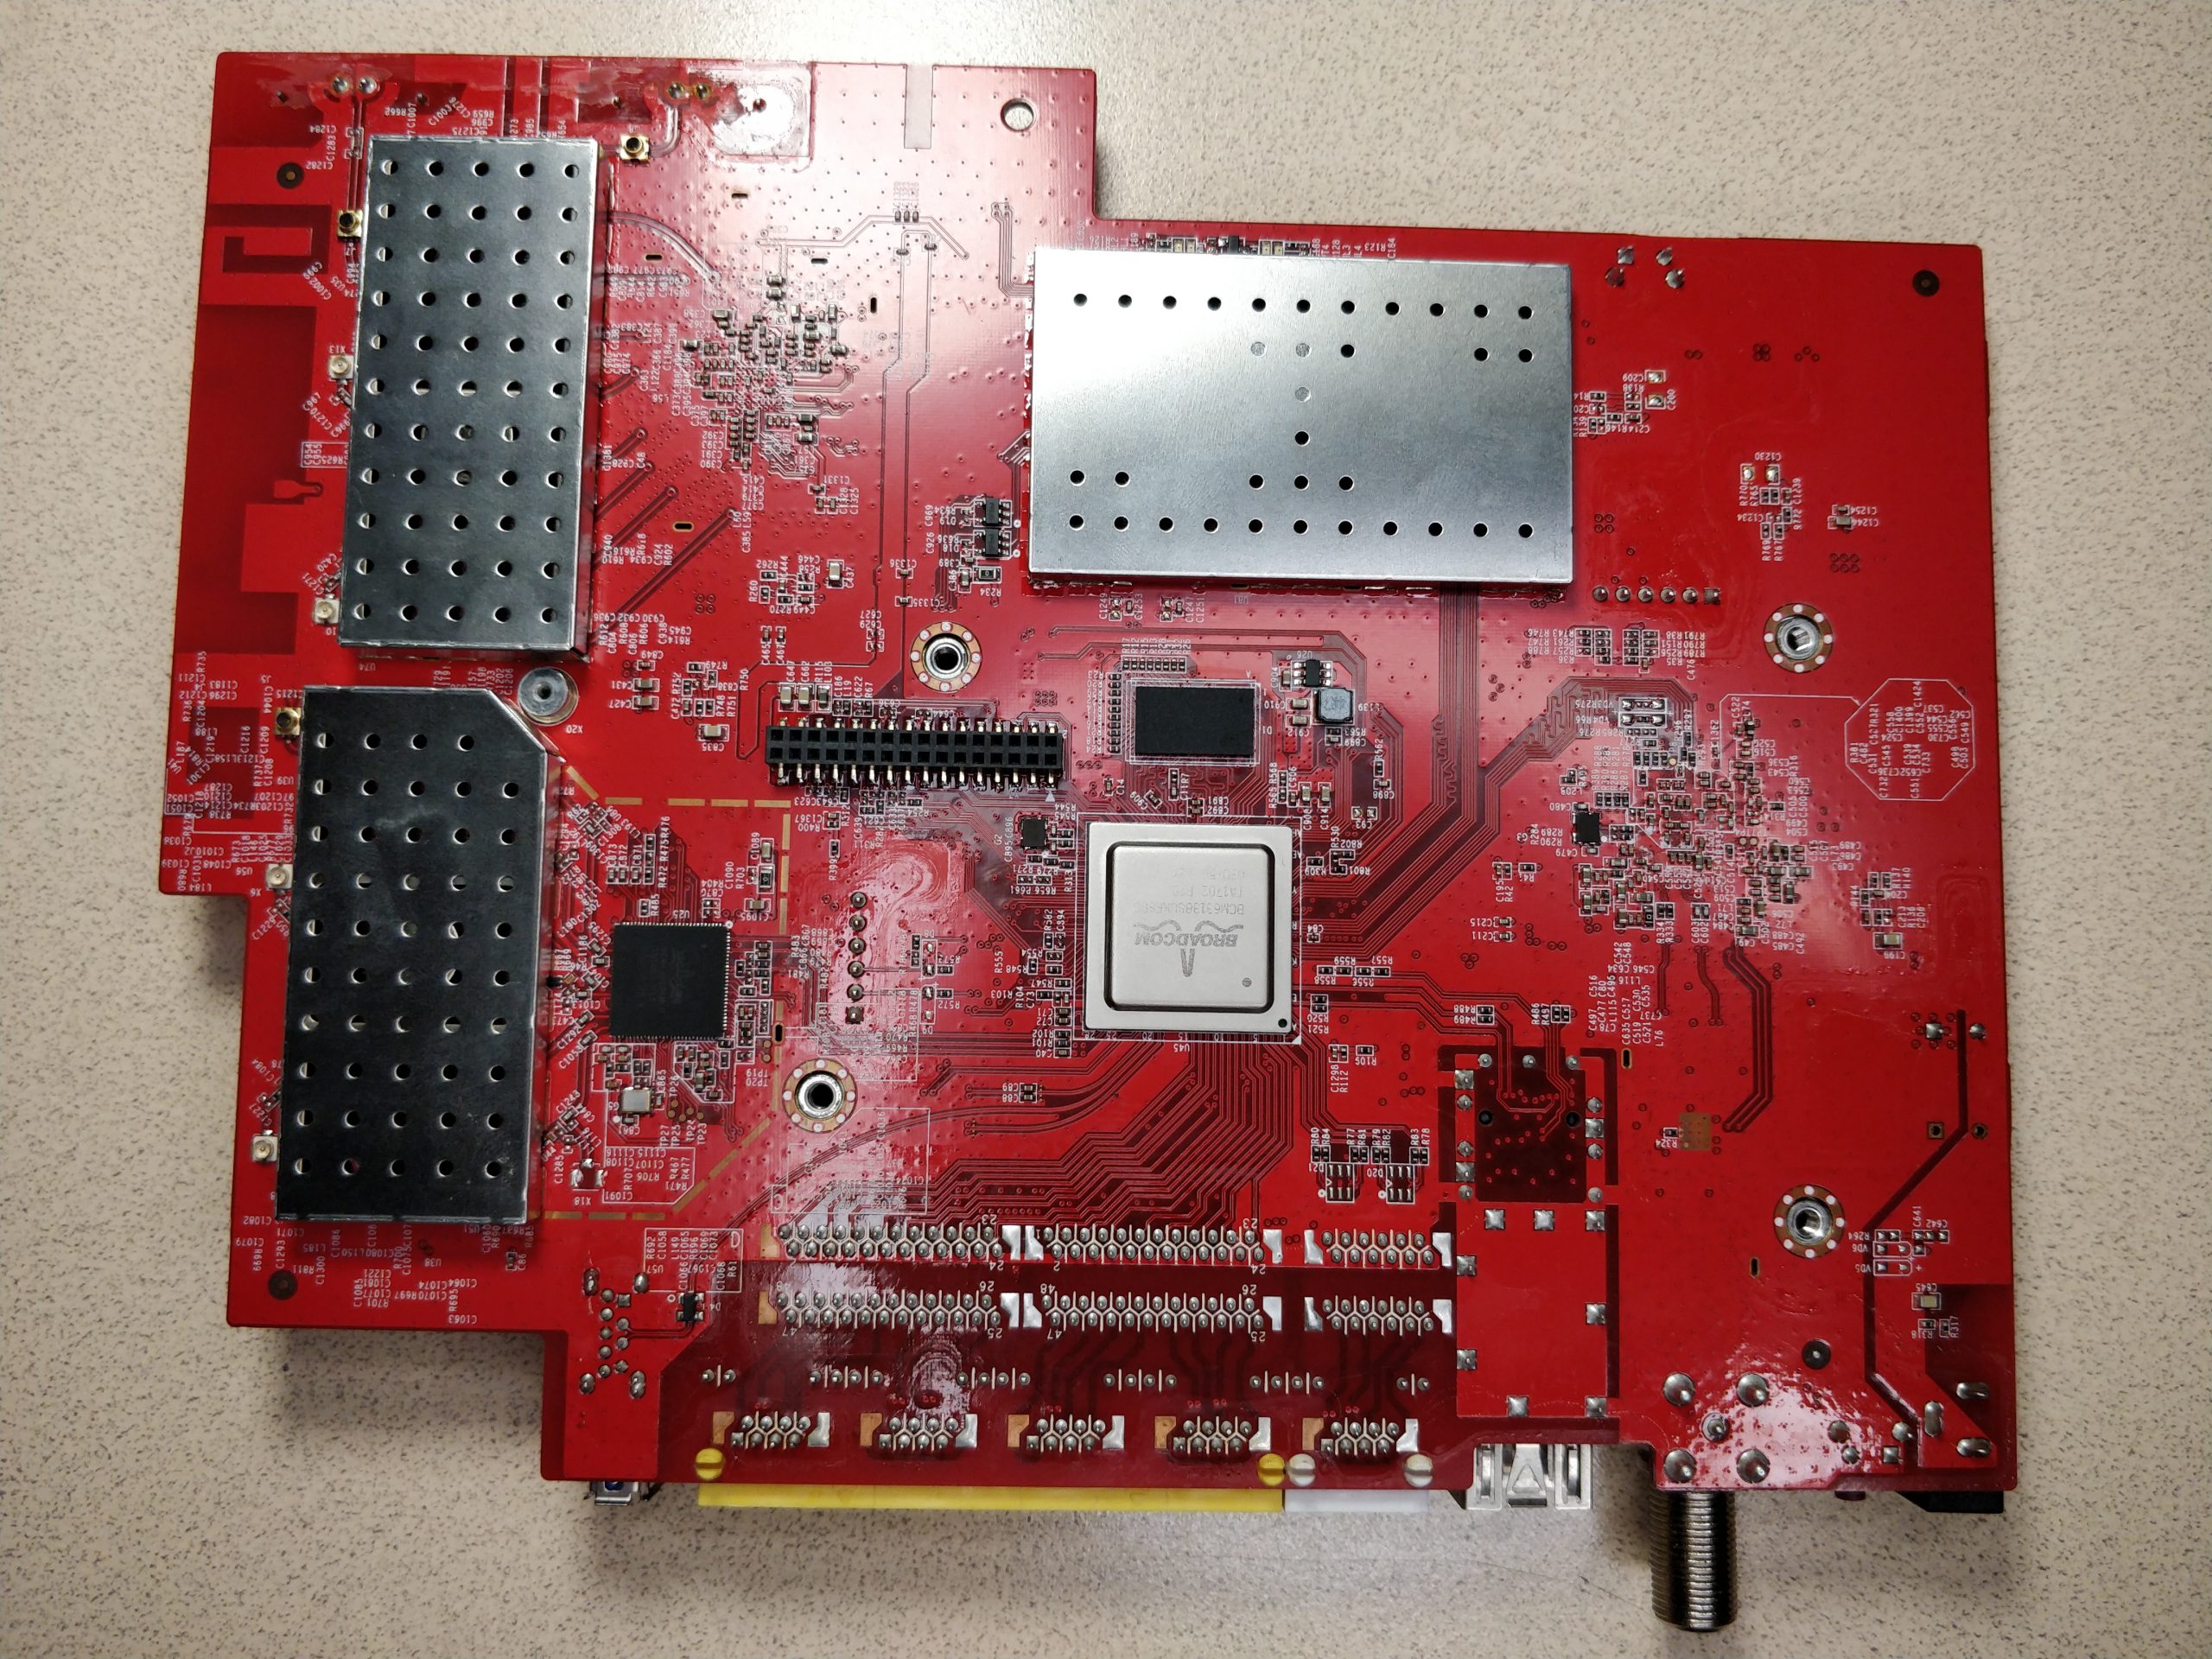
The two serial console headers are already soldered on the board.
The serial console called Serial 1 (marked X3 on the board) in the picture below and the logs attached to the bottom of this article only outputs debug information for the MOCA chip and does not have any further functionality.
The second serial console, Serial 2 (marked X9 on the board) next to the flash storage, does provide the full serial console to the router. Both the locked-down uboot and linux consoles.
USB Storage
I will let it be known that the router does create a directory named Admin on an empty fat32 formatted flash drive connected to it during boot.
Reading a few articles on exploiteers regarding consumer electronics equipment gives me an idea that this might be used as a method for quick updates or script execution. Or it might also just be meant for Samba.
However, this path requires a lot of guessing, analysis of serial console logs and more research.
Flash Chip Extraction
It is also possible to take the flash chip off the board and extract its contents, possibly finding the special login username/password by cracking the md5 encrypted password (probably md5).
I currently do not have the equipment required to read the flash chip or solder it back on reliably. Any help on the subject would be appreciated.
Command Injection
It also may be possible to inject commands into the router using the diagnostics tool in the advanced settings, such as the iperf or ping test.
It seems that it’s possible to inject illegitimate commands using http request forgery to be executed on the router, I can see the forged commands being executed because they have some serial output.
I have not been able to execute anything that could give access however, commands such as the following does not give any serial output.
echo test > /dev/ttyS0
Resources
Exploiteers videos and website.
https://forum.telus.com/t5/Internet-Home-Phone/How-to-Disable-DHCP/m-p/102538
Serial Console Logs
Serial 1 Logs:
Serial 2 Logs (Main):